
How to assemble our items
Thank you for the purchase from us at D&R Rustics. Please click on the item tab below and follow the how to instructions to assemble your furniture.
If you have any problems please do get in touch with the contact tab and we shall be with you as soon as possible to get your questions answered.
General Questions
DINING TABLE INSTRUCTIONS
BED INSTUCTIONS
repair kit
Contact Questions
1. General Questions
What should i do if my item has arrived damaged
If you have receievd your order but the item has been damaged in transit, please get in touch as soon as possible. Ideally do not remove from the pallet/packaging and contact us as soon as possible to find out what options are available. If your item is damaged to the point of rejection please reject the item from the courier and have this returned. We will then get this repaired/replaced within 3-5 working days.
How do I track my order?
Once your order has been shipped you will receive a personal email from ourselves Josh or Rhys. If your order is with a courier i.e Everi, ParcelForce then you will receive tracking information which you can track on there website.
If your order is with a pallet company, Pallex. Then the tracking will be through ourselves, we will advise you of a planned delivery date. The morning of delivery we shall provide you with a 3 hour time window.
My order is coming on a pallet
If your order is large and you have been told its coming on a pallet. Please be advised this is a curbside delivery only. With that in mind, the courier wont just drop your pallet on the curb, they will place the pallet where ever you state. Due to insurance purposes the courier is not liable for carrying the goods into your home. So depending on the size of your item we would advise 2 people to be present to carry indoors.
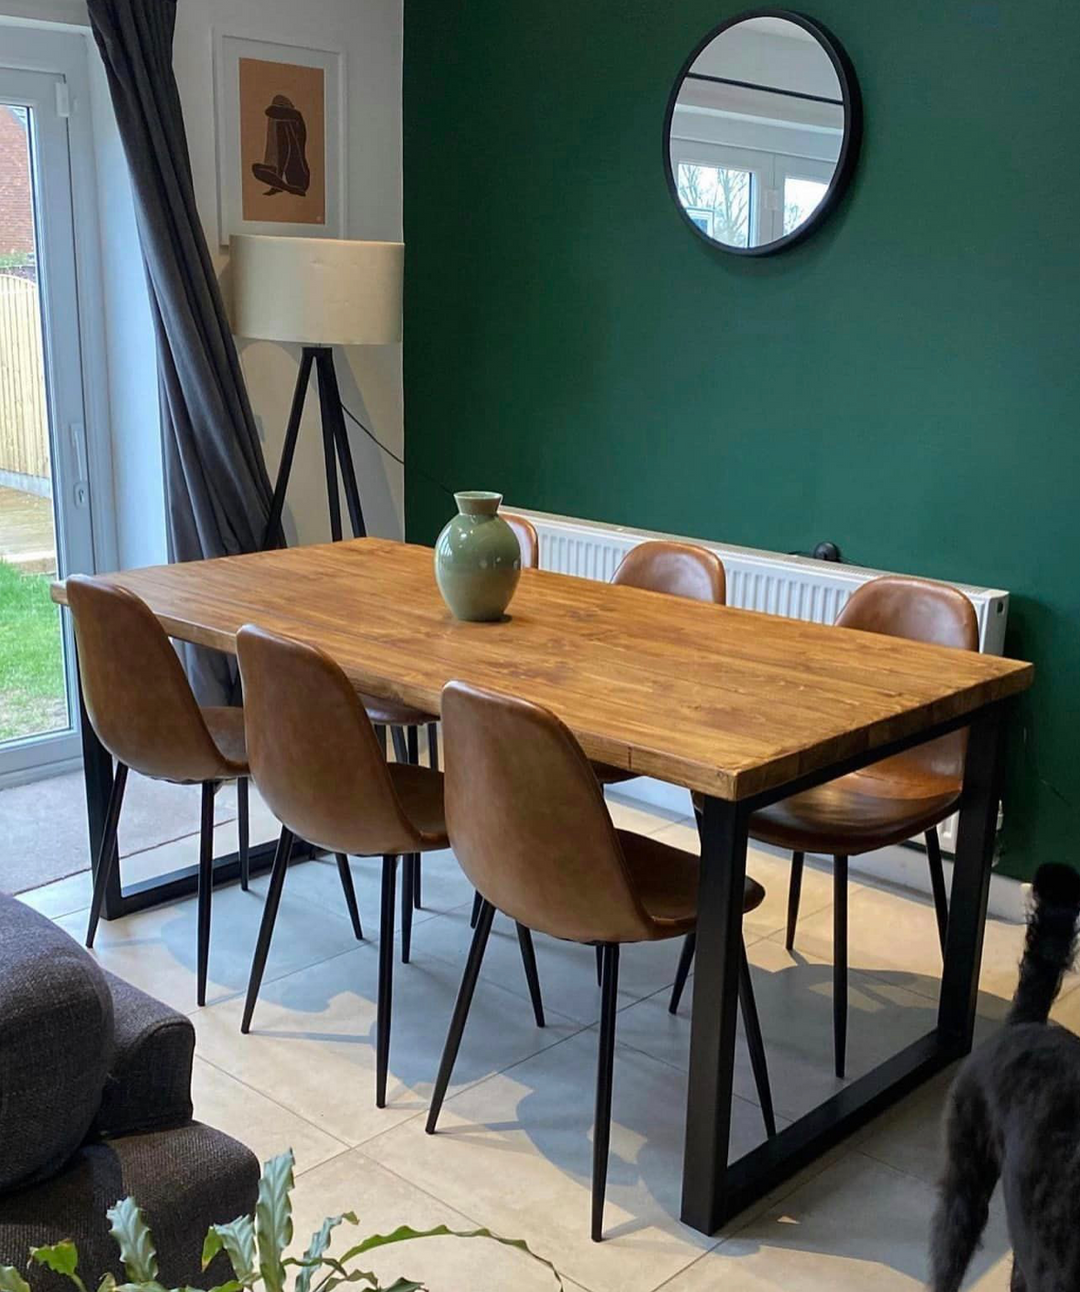
D&R RUSTICS TABLE ASSEMBLY INSTRUCTIONS X-Frame | A-Frame | Square Legs | Trapezium Legs
What's In Your Package
* 1 Table top* 1 Pair of table legs (X-Frame, A-Frame, Square, or Trapezium style)
* 20 Screws (plus spares)
* If ordered: Benches (arrive pre-assembled - no assembly required!)
Tools You'll Need
* Phillips head screwdriver OR drill with Phillips bit* Measuring tape (optional - for perfect positioning)
* That's it! Simple and straightforward.
Estimated Assembly Time: 15-25 minutes Recommended: 2 people for easier handling of larger tables
Step-by-Step Assembly
Step 1: Position Your Table Top
* Place the table top on the floor top side down* Use a soft surface (carpet/blanket) to protect the finished surface
* Ensure you have enough space to work around all edges
Step 2: Position the Table Legs
* Place your table legs on the underside of the table top* Position them approximately 5cm-10cm from the edge
* Ensure legs are even around all edges and central to the table
* Take a moment to double-check alignment before securing
Step 3: Attach the Legs
* Using your Phillips screwdriver or drill, attach the legs with the provided screws* No pilot holes needed - this maintains the structural strength of your handmade table
* Secure all screws firmly but don't over-tighten
* Use the spare screws if needed
Step 4: Final Assembly
* Once all screws are secure, carefully turn the table upright* Get help for this step - protect both your back and your beautiful table!
* Position your table in its final location
Final Check
✓ All screws tight and secure ✓ Table sits level and stable ✓ Legs positioned evenly ✓ Ready for years of family meals!If You Ordered Benches
Your benches arrive fully assembled - simply unpack and position alongside your table. No assembly required!Pro Tip: The 5cm-10cm positioning from the edge ensures optimal stability while showcasing the beautiful leg design that makes each D&R Rustics table unique.
We'd Love to See Your Finished Table! Once your table is assembled and in position, we'd really appreciate some photos of it in your dining space! We love seeing our Welsh-crafted furniture in customers' homes. Share via email or tag us on social media!
D&R RUSTICS SPIDER LEG TABLE ASSEMBLY INSTRUCTIONS Spider Leg Table | Round Spider Leg Table
What's In Your Package
* 1 Table top (round or rectangular)* 1 Spider leg base with adjustable feet
* Approximately 20 screws (including spares)
Tools You'll Need
* Phillips head screwdriver OR drill with Phillips bit* That's it! Simple and straightforward.
Estimated Assembly Time: 15-25 minutes Recommended: 2 people for easier handling of larger tables
Step-by-Step Assembly
Step 1: Position Your Table Top
* Place the table top on the floor top side down* Use a soft surface (carpet/blanket) to protect the finished surface
* Ensure you have enough space to work around all edges
Step 2: Position the Spider Legs
* Place your spider leg base on the underside of the table top* Position the legs in the center of the table (this is key for spider leg design!)
* Ensure the base is perfectly centered for optimal stability
* Take a moment to double-check alignment before securing
Step 3: Attach the Legs
* Using your Phillips screwdriver or drill, attach the spider legs with the provided screws* No pilot holes needed - this maintains the structural strength of your handmade table
* Secure all screws firmly but don't over-tighten
* Use the spare screws if needed
Step 4: Final Assembly & Leveling
* Once all screws are secure, carefully turn the table upright* Get help for this step - protect both your back and your beautiful table!
* Position your table in its final location
* Adjust the feet to ensure your table sits perfectly level on any surface
Final Check
✓ All screws tight and secure ✓ Table sits level and stable (use adjustable feet as needed) ✓ Spider legs centered perfectly ✓ Ready for years of family meals!Pro Tip: The adjustable feet allow you to level your table perfectly on any surface, while the spider legs positioned in the center create exceptional stability and that distinctive aesthetic that makes your D&R Rustics table a true statement piece.
We'd Love to See Your Finished Table! Once your table is assembled and in position, we'd really appreciate some photos of it in your dining space! We love seeing our Handcrafted furniture in customers' homes. Share via email or tag us on social media!
2. HOW DO I PROTECT THE WOOD?
Just delivered?
If you have
just had your furniture from D&R Rustics delivered. Please ensure
for the first 1-3 days you do not clean your dining table with a damp
cloth too vigorously. Just whilst the wax adjusts and sets. But this is
normally fine due to the time the item has been waxed for before
delivery.
Waxing
Regular
waxing boosts the protection and overall appearance of the wood. You
can wax your furniture as much as you want but once or twice a year is
adequate.
Waxing is quick and easy and shouldn’t take you long at all (it smells great too).
Using
an old rag or similar lint-free cloth, generously apply the wax in
circular motions to spread the wax evenly over the surface and then
following the grain to remove any excess.
After giving the furniture a coat of wax all over, you should notice it looking dull but don’t worry, this is normal.
Immediately buff with another clean rag,
cloth, or buffing brush, give all surfaces a buff. It’s up to you how
shiny you want it; it doesn’t take much effort to get a mid-sheen (like
when you received your furniture) or continue to buff for a glossier
finish.
D&R RUSTICS BED ASSEMBLY INSTRUCTIONS Your Handmade Bed - Ready to Assemble
What's In Your Package* 1 Headboard
* 1 Footboard (kicker)
* 2 Bed sides with pre-attached brackets
* 5 Bed slats
* 8 Screws (plus spares)
* 2 Positioning blocks
Tools You'll Need
* Phillips head screwdriver OR drill with Phillips bit
* That's it! We've kept it simple.
Estimated Assembly Time: 20-25 minutes Recommended: 2 people for easier handling
Step-by-Step Assembly
Step 1: Position Your First Bed Side
* Take one bed side and place it on top of the 2 positioning blocks* Position the blocks against either the headboard OR footboard
* Make sure the bed side sits flush with the edge of the headboard/footboard
* The positioning blocks will hold everything perfectly in place
Step 2: Attach First Side
* Using your Phillips screwdriver or drill, screw through the bracket already attached to the bed side* The bracket will guide your screws into the headboard/footboard
* Secure with the provided screws
* No pilot holes needed - just screw straight through the bracket
Step 3: Repeat for Second Side
* Move the positioning blocks to the opposite end (headboard if you started with footboard, or vice versa)* Place the same bed side on the blocks, flush with the edge
* Screw through the bracket to secure
* Your first bed side is now fully attached!
Step 4: Attach Second Bed Side
* Repeat the entire process with your second bed side* Use positioning blocks at both ends
* Screw through brackets at headboard and footboard
* Frame is now complete!
Step 5: Install Bed Slats
* Place all 5 bed slats evenly across the supports attached to your bed sides* Space them out for even mattress support
* No screws needed - they simply rest on the supports
Final Check
✓ All screws tight and secure ✓ Frame feels solid when gently tested ✓ Slats evenly spaced ✓ Ready for your mattress!
When you place your mattress on the bed, it should fit snug within the frame. This secure fit is by design - it keeps your mattress properly positioned and showcases the beautiful craftsmanship of your handmade bed frame.
Pro Tip: The positioning blocks ensure perfect alignment every time - this is how we maintain our quality standards even during home assembly!
We'd Love to See Your Finished Bed! Once you've assembled your bed and it's all set up in your room, we'd really appreciate if you could send us some photos! We love seeing our handcrafted furniture in customers' homes - it's the best part of what we do. Share your photos via email or tag us on social media!
D&R RUSTICS FURNITURE REPAIR KIT INSTRUCTIONS Keeping Your Handmade Furniture Beautiful for Years
* Wire wool
* Furniture wax
* Application cloth (for wax)
* Buffing cloth
* Work in direction of wood grain
* Use gentle, even pressure
* Ensure surface is completely clean
* Check for any remaining debris
* Work in circular motions for even coverage
* Don't apply too thick - thin, even coats work best
* Remove excess wax with clean cloth
* Ensure even coverage across the surface
* Work gently for smooth, professional result
Metal Repairs - Paint Pen Process
1. Shake the paint pen thoroughly
2. Press the nib until paint comes to the end
3. Apply paint directly to damaged area
4. Let dry completely before use
Common Repairs & Solutions
* Sand lightly to level the scratch
* Focus wax application on affected area
* Wire wool buffing will blend the repair seamlessly
* Clean the damaged area first
* Follow paint pen process above
* Start with wiping and dusting
* Apply wax to restore surface
* Light sanding refreshes the surface
* Wax application restores protection and shine
* Sand gently to remove the mark
* Multiple thin wax coats may be needed
* Use full 5-step process every 3-6 months
* Prevents minor issues becoming major problems
Natural Wood Movement Effects
* Wire wool buffing maintains smooth surface
When NOT to Use This Kit
* Severe splitting or major warping
* Joint failure or structural collapse
* Deep gouges that go through the wood
* Broken or loose joints requiring re-gluing
* Major metal damage or rust
Prevention Tips
✓ Regular maintenance using this 5-step process ✓ Use coasters and placemats ✓ Clean spills immediately ✓ Dust regularly with soft cloth ✓ Keep metal components dry to prevent rust
Need More Help? Contact us if you're unsure about any repair. We're proud of our craftsmanship and want your furniture to last for generations.
Share Your Results! We'd love to see your restored furniture! Send us photos of your maintenance work.
What's In Your Repair Kit
* Sandpaper* Wire wool
* Furniture wax
* Application cloth (for wax)
* Buffing cloth
* Paint pen (for metal repairs)
The D&R Rustics 5-Step Process
(For Wood Repairs)
Step 1: Sand
* Lightly sand the area needing attention* Work in direction of wood grain
* Use gentle, even pressure
Step 2: Wipe and Dust
* Remove all sanding dust with cloth* Ensure surface is completely clean
* Check for any remaining debris
Step 3: Apply Wax
* Use application cloth to apply wax evenly* Work in circular motions for even coverage
* Don't apply too thick - thin, even coats work best
Step 4: Remove Wax
* Allow wax to penetrate as directed* Remove excess wax with clean cloth
* Ensure even coverage across the surface
Step 5: Buff with Wire Wool
* Use wire wool to buff to desired finish* Work gently for smooth, professional result
* This creates the beautiful final sheen
Metal Repairs - Paint Pen Process
For Scratches or Chips on Metal Components
2. Press the nib until paint comes to the end
3. Apply paint directly to damaged area
4. Let dry completely before use
Simple and effective for maintaining your metal table legs and hardware!
Common Repairs & Solutions
Minor Scratches & Surface Marks (Wood)
Solution: Follow full 5-step process
* Focus wax application on affected area
* Wire wool buffing will blend the repair seamlessly
Metal Scratches & Chips (Metal Components)
Solution: Paint pen repair
* Follow paint pen process above
* Perfect for table legs and metal hardware
Scuffs & Light Surface Damage (Wood)
Solution: Steps 2-5 (may not need sanding)
* Apply wax to restore surface
* Buff with wire wool for smooth finish
Dull or Worn Finish Areas (Wood)
Solution: Full 5-step process
* Wax application restores protection and shine
* Wire wool buffing brings back the luster
Water Rings & Heat Marks (Wood)
Solution: Full 5-step process with extra attention
* Multiple thin wax coats may be needed
* Patient wire wool buffing for best results
General Wear & Tear (Wood)
Solution: Regular maintenance routine
* Prevents minor issues becoming major problems
* Keeps your furniture looking handcrafted-new
Natural Wood Movement Effects
What it looks like: Seasonal expansion/contraction, minor warping, color changes, settling Solution: This is normal! Light maintenance with steps 3-5
* Apply wax to nourish the wood* Wire wool buffing maintains smooth surface
* These are signs of authentic craftsmanship, not defects
* Severe splitting or major warping
* Joint failure or structural collapse
* Deep gouges that go through the wood
* Broken or loose joints requiring re-gluing
* Major metal damage or rust
For major repairs, contact us directly - we're here to help!
✓ Regular maintenance using this 5-step process ✓ Use coasters and placemats ✓ Clean spills immediately ✓ Dust regularly with soft cloth ✓ Keep metal components dry to prevent rust
Need More Help? Contact us if you're unsure about any repair. We're proud of our craftsmanship and want your furniture to last for generations.
Share Your Results! We'd love to see your restored furniture! Send us photos of your maintenance work.